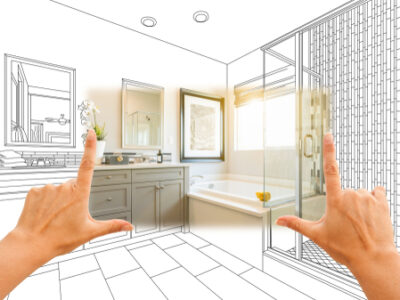
Choosing the perfect bathtub for your bathroom can be an overwhelming task. With so many options available in the market, it’s easy to get confused and make the wrong decision. However, by considering a few important factors, you can make an informed choice that meets all your requirements. Here are some essential things to look for when buying a bathtub:
1. Size and Space:
The size of your bathroom and the available space are crucial factors to consider before purchasing a bathtub. Measure the dimensions of your bathroom accurately to determine the size of the tub that will fit in the designated area. Consider the layout and other fixtures in the room as well. You don’t want to end up with a bathtub that is too big for the space or doesn’t allow for easy movement around the room.
2. Material:
Bathtubs are available in various materials, each with its own pros and cons. The most common materials used for bathtubs are acrylic, fiberglass, cast iron, and marble. Acrylic is lightweight, durable, and easy to clean. Fiberglass is similar to acrylic but tends to be less costly. Cast iron is a classic choice known for its sturdiness and heat retention. Marble offers a luxurious look but requires regular maintenance. Consider the durability, maintenance requirements, and aesthetic appeal of each material before making your decision.
3. Style and Design:
Bathtubs come in a wide range of styles and designs, from traditional to contemporary. Consider the overall theme and style of your bathroom and choose a bathtub that complements it. Freestanding tubs are a popular choice for adding a statement piece to the bathroom, while alcove tubs are more suitable for smaller spaces. Clawfoot tubs are perfect for a vintage or antique look, while drop-in tubs offer a seamless and integrated appearance. Don’t forget to consider the shape, color, and finish of the tub as well.
4. Comfort Features:
When buying a bathtub, it’s important to prioritize your comfort and relaxation. Look for features that enhance your bathing experience, such as built-in armrests, headrests, or ergonomic designs. Some bathtubs also offer hydrotherapy options like whirlpool or air-jet systems that provide a soothing massage experience. If you have specific needs or health concerns, consider features like grab bars or ADA-compliant designs for better accessibility.
5. Installation:
Before finalizing your bathtub choice, it’s crucial to consider the installation process and requirements. Some tubs are designed for easy installation and can be a DIY project, while others might require professional assistance. Determine whether the tub needs to be installed against a wall or as a freestanding feature. Consider the weight of the tub as well, as heavier materials like cast iron will require additional support. Check if your bathroom meets the necessary plumbing and electrical requirements for the chosen tub.
6. Budget and Longevity:
Setting a budget is essential to ensure you don’t overspend on your bathtub. Determine how much you’re willing to invest in this purchase and look for options that fit within your budget. Remember to consider not only the initial cost but also the long-term durability and maintenance requirements. Cheaper materials might wear out quickly and require more frequent repairs or replacements, while higher-quality materials may offer better longevity and cost savings in the long run.
Summary
Buying a bathtub is a significant investment, and considering these factors will help you make an informed decision. Think about the size and space available, the material, style, comfort features, installation process, and your budget. By carefully evaluating these factors, you’ll be able to find a bathtub that not only looks great but also provides you with years of relaxation and enjoyment in your bathroom.
Got Questions? Let Us Help!
Welcome to A-1 Porcelain & Fiberglass Service Co., L.L.C.! Since 1975, we have been providing bathtub and shower refinishing services in Phoenix, AZ and the surrounding areas. Working on all bathroom fixtures, our experts will repair your tubs, showers, and sinks. We specialize in repairing cracked fiberglass tubs. We will also refinish tubs, showers, sinks, tiles, and vanities. Our happy customers also know to call us for maintenance including caulking, installation, and replacement of all bathroom fixtures. Call us today for all of your bathroom repair and refinishing needs!
Can A Bathroom Remodel Increase the Value Of My Home?
If you’re considering selling your home, you may be wondering if a bathroom remodel is worth the investment. Updating a bathroom can be a significant expense, but it can also add value to your home and make it more appealing to potential buyers. In this blog post, we’ll discuss the various ways a bathroom remodel can increase the value of your home and how to maximize your return on investment.
1. Increased Home Value
One of the main benefits of a bathroom remodel is that it can increase the value of your home. According to a Remodeling Magazine report, an average bathroom remodel returns 60% to 70% of the initial investment upon resale. This means that if you invest $10,000 into your bathroom remodel, you could potentially increase the value of your home by around $6,000 to $7,000.
2. Better First Impressions
A well-designed and updated bathroom can make a better first impression on potential buyers. A clean, modern, and functional bathroom can help create a greater impact on buyers and lead to more offers. If the bathroom is outdated or poorly maintained, it can lower the overall appeal of your home and drive potential buyers away.
3. Improved Functionality
An outdated or poorly designed bathroom can be inconvenient and frustrating. By upgrading, you can improve the bathroom’s functionality and provide buyers with a more modern and convenient place to relax and refresh themselves. For example, adding a double vanity can allow for two people to use the bathroom at the same time, while installing a larger shower can make the morning routine less stressful and more enjoyable.
4. Energy Efficiency
Energy-efficient fixtures are becoming more and more popular among homeowners, and the same goes for buyers. Updating your bathroom to include low-flow showerheads and faucets, energy-efficient toilets, and LED lighting can save on energy and water bills for potential buyers, making it more attractive to them. It not only helps in reducing bills but also many buyers take it as a huge plus in case they have an eco-friendly mindset.
5. Increased Space
A common reason for remodeling a bathroom is to increase the usable space. Not all bathrooms are created equal, and some might have a poor layout or lack storage. A bathroom renovation can help solve these issues, giving you more storage options while improving the overall function of the space. With clever storage space throughout the bathroom, buyers are likelier to be interested, and there are a plethora of ways to add such space.
Maximizing Your Return on Investment
If you’re planning a bathroom remodel to increase the value of your home, there are a few things you can do to maximize your potential return on investment.
1. Choose Neutral Colors and Modern Styles
Choosing modern and neutral colors can help appeal to a broader range of potential buyers. While brightly colored tiles or bold furniture might be appealing to some, it can be a turn-off to others. Neutral colored tiles and modern fixtures are more likely to appeal to a broader range of potential buyers.
2. Don’t Skimp on Quality
While it’s important to stick to a budget, don’t skimp on quality when it comes to your bathroom remodel. Investing in high-quality materials and fixtures can make a difference when it comes to the final look and functionality of the bathroom, which can increase the value of your home and the appeal to potential buyers. Spend a little more for quality so that it will be worth it in the long run.
If you’re on a tight budget, focus on the basics first. A fresh coat of paint, modern fixtures, and new tile can be an affordable way to update and enhance the look of your bathroom. It’s always better to build on a good foundation before going big.
Final Thoughts
A bathroom remodel can increase the value of your home and make it more appealing to potential buyers. An updated bathroom can create a better first impression, improve functionality, and offer energy efficiency while increasing space. However, it’s important to keep in mind that the ROI will depend on the quality of materials, the budget, and the seller’s preferences. Focus on the basics and choose neutral colors and modern styles. Remember to hire professionals when needed and invest in quality products for long-term benefits.
A bathtub is an essential part of any bathroom, providing a relaxing and soothing place to unwind and rejuvenate. However, over time, a bathtub can become outdated, worn out, or damaged, prompting the need for a replacement. The process of choosing the right bathtub replacement can be overwhelming, with so many options available. In this blog post, we’ll discuss the crucial factors to consider when selecting the best bathtub replacement for your bathroom.
Size and Shape
The size and shape of the bathtub replacement can significantly impact the overall look and functionality of your bathroom. When selecting a bathtub, consider the space available, the number of people who will be using it, and your personal preferences.
If you have limited space, a smaller-sized bathtub, such as a corner tub or a standard alcove tub, can be an excellent option. For larger bathrooms, a freestanding or oval soaking tub can create a luxurious spa-like feel. It is essential to ensure that the bathtub replacement fits well in your bathroom, leaving ample space for other necessary fixtures and countertops.
Material
The bathtub’s material can impact the tub’s durability, performance, and maintenance requirements. Bathtub replacements come in various materials, including acrylic, fiberglass, porcelain, cast iron, and steel.
Acrylic and fiberglass are popular choices because of their lightweight, easy maintenance, and affordability. Porcelain, cast iron, and steel tubs are more durable and have a classic look that can last for decades. However, they can be heavy and require more maintenance to prevent rust and stains.
Style and Design
The style and design of the bathtub can have a significant impact on the overall aesthetics of your bathroom. Bathtubs come in various styles, including traditional, modern, and contemporary. The design can range from simple and sleek to ornate and decorative, depending on your personal preferences.
When selecting a bathtub replacement, consider the style and design of your bathroom. You want a bathtub that complements your existing décor and adds to the overall ambiance. A classic, clawfoot tub can add vintage charm, while a modern, minimalist bathtub can create a sleek and sophisticated look.
Functionality
The functionality of the bathtub replacement can significantly impact its overall performance and usefulness. Consider the features of the bathtub, such as the type of filling and draining system, the number of jets and their position, and the type of surface coating.
A bathtub with a fast-filling and draining system can save time and water, while a bathtub with adjustable jets can provide a customized and therapeutic massage experience. The surface coating or finish can also affect the bathtub’s durability and resistance to scratches, stains, and chemicals.
Installation
The installation process of the bathtub replacement can affect the overall cost, time, and effort required. Some bathtubs require professional installation and plumbing work, while others can be easily installed with basic DIY skills and tools.
Freestanding tubs and walk-in tubs can be more complicated to install and require professional assistance. Alcove tubs and drop-in tubs, on the other hand, can be simpler and easier to install, requiring only basic plumbing work.
Cost
The cost of a bathtub replacement can vary significantly depending on the material, size, design, and installation requirements. Acrylic and fiberglass tubs are generally less expensive than porcelain, cast iron, or steel tubs. Freestanding and custom-made tubs tend to be more expensive than standard alcove or drop-in tubs.
When selecting a bathtub replacement, consider your budget and prioritize the features that are most important to you. Remember that investing in a bathtub replacement is a long-term investment that can add value to your home and enhance your daily life’s quality.
Final Thoughts
Choosing the best bathtub replacement requires careful consideration of various factors, including size and shape, material, style and design, functionality, installation, and cost. When selecting a bathtub replacement, keep in mind the space available, the number of people who will be using it, and its maintenance requirements. Invest in a bathtub that adds value and functionality to your bathroom, creating a relaxing and rejuvenating environment for you and your family to enjoy.
Whether it’s a pesky yellow stain on your glass shower or a crusty film of soap scum on your shower door, hard water stains can be tough to get rid of. Fortunately, there are a few ways you can tackle those pesky stains without resorting to harsh chemicals. These natural cleansers are sure to leave your shower looking like new again!
Vinegar
Vinegar is a natural disinfectant that can kill bacteria and germs. White vinegar can be used to remove hard water stains from glass shower doors and faucet heads, as well as soap scum. It is an effective alternative to harsh chemicals and can be easily purchased at your local grocery store. If you have a showerhead that is soiled with mineral deposits, try wrapping it in a plastic bag and filling it with white vinegar. The acetic acid in the vinegar will break down the mineral deposit build-up. Leave it in the solution for up to 30 minutes.
Baking Soda
Baking soda is a great cleaning product and it can be used to remove pesky shower stains. It can be used as a mild abrasive, scouring agent and deodorizer to dissolve dirt, tackle odors, and cut through grime. All you have to do is combine a mixture of vinegar and water to create a cleaning solution and apply it to the stained area. Then you can wipe it clean with a cloth. And the best thing about baking soda is that it’s affordable and effective at many of its cleaning tricks.
Hydrogen Peroxide
Hydrogen peroxide is an antiseptic liquid that’s traditionally used to clean cuts and skin wounds. But the stuff is also useful for disinfecting, whitening and stain removal. You can use hydrogen peroxide on pretty much anything in your home, as long as you don’t use too strong of a concentration. And it’s safer than bleach, too! Mix a solution of baking soda and 3% hydrogen peroxide for a paste that will help get rid of pesky shower stains. Or spray it onto mildewy shower curtains, walls, and tile surfaces to kill the mold and mildew that’s built up there.
Welcome to our blog. We are glad you found your way here. You will find interesting and valuable articles pertaining to our business and the services we offer. Continue to come back as our blog will be coming soon with updated articles.
 Can A Bathroom Remodel Increase the Value Of My Home?
 How To Choose The Best Bath Tub Replacement?